Chapter 5: Radio Transmitter Calibration
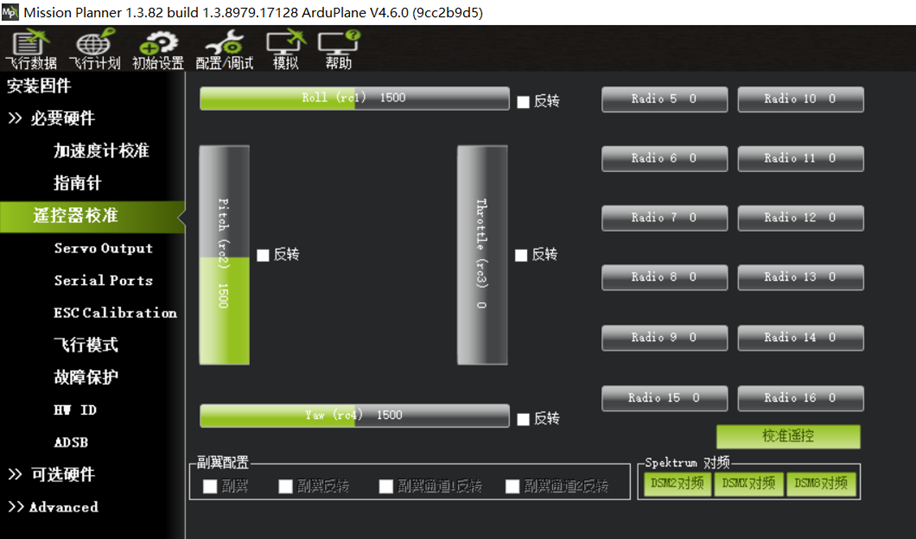
If the radio transmitter is powered on and correctly bound to the receiver, but the receiver wiring to the flight controller or the corresponding serial-port configuration is incorrect, the radio calibration page will not display the Thrttle signal or channel values for channels 5~16, as shown below.
When the receiver is wired correctly to the flight controller and the corresponding serial port is configured correctly, all channels display green slider values.
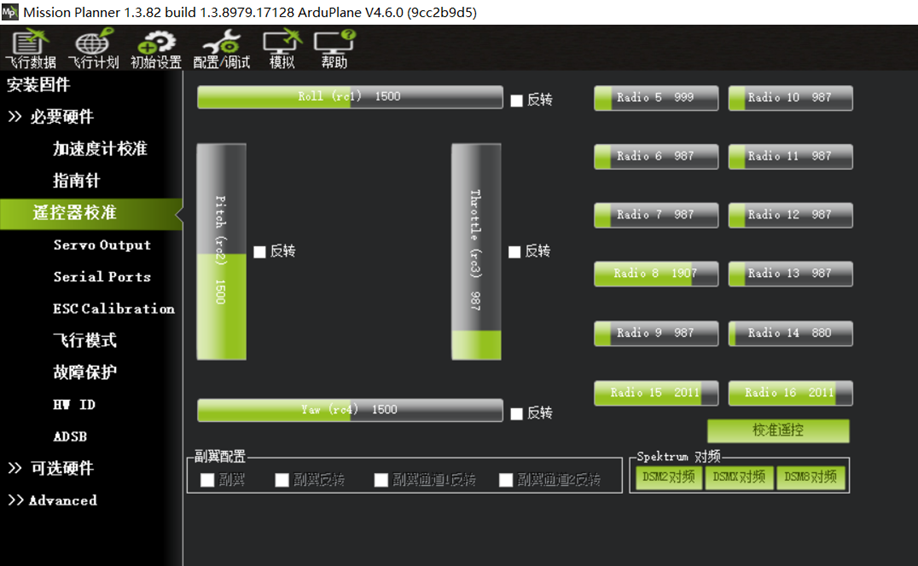
You can now calibrate the radio transmitter sticks and switch channels.
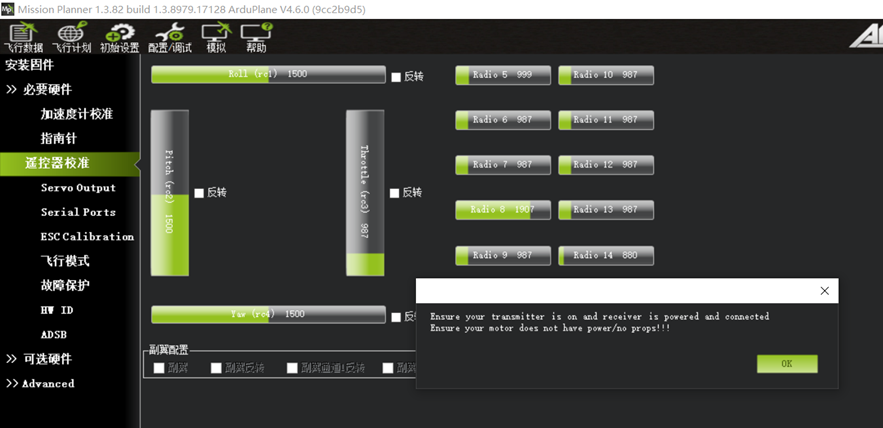
Click “Calibrate Radio.” The dialog “Ensure your transmitter is on and receiver is powered and connected. Ensure your motor does not have power/no props!!!” reminds you to verify the throttle-channel direction and ensure that the motors are not powered and no propellers are installed. Click OK, as shown below:
The dialog “Click OK and move all RC sticks and switches to their extreme positions so the red bars hit the limite” instructs you to move every stick and switch channel, including six-position switches, through its full range so the red bars capture the minimum and maximum channel outputs. Click OK, as shown below:
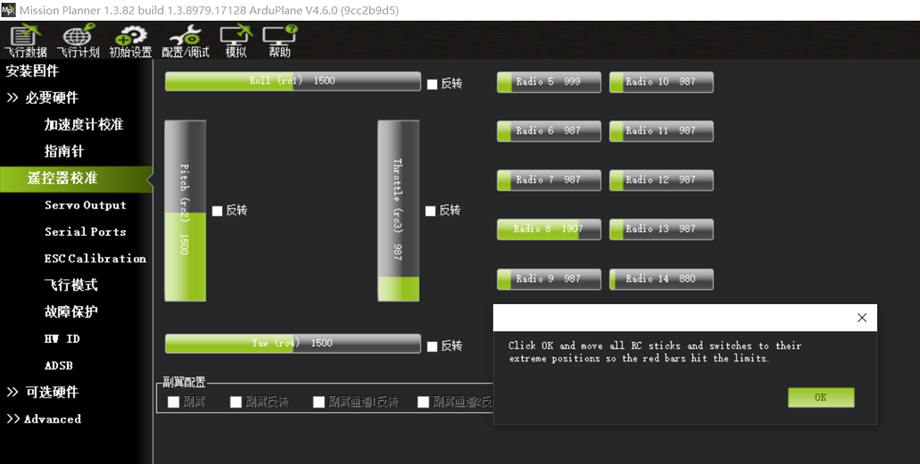
Move all sticks, switch channels, and six-position switch channels through their full ranges. The red bars on the screen mark the minimum and maximum output values. For Ardupilot firmware, it is recommended to enable Pitch rc2 reverse. Click “Click when Done,” as shown below.
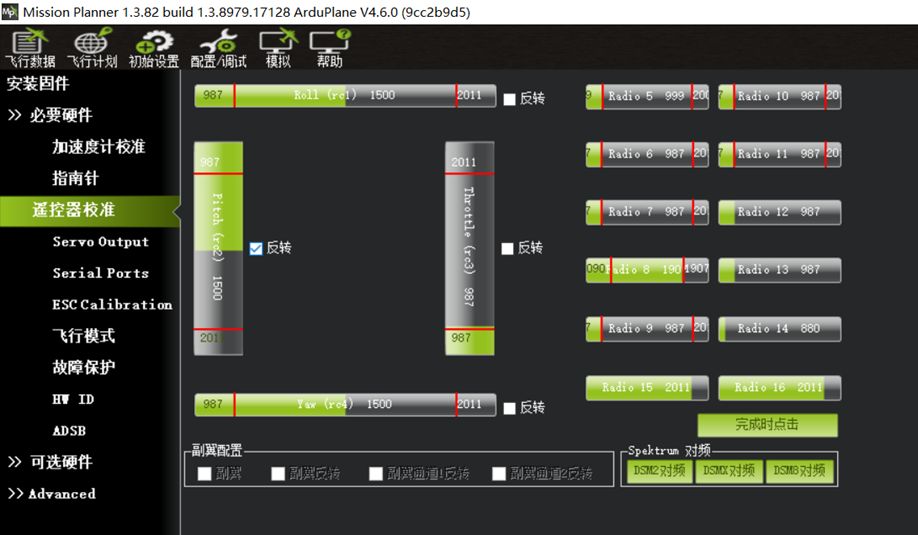
After clicking OK, a dialog displays the minimum and maximum input values for each channel. Click OK, as shown below:
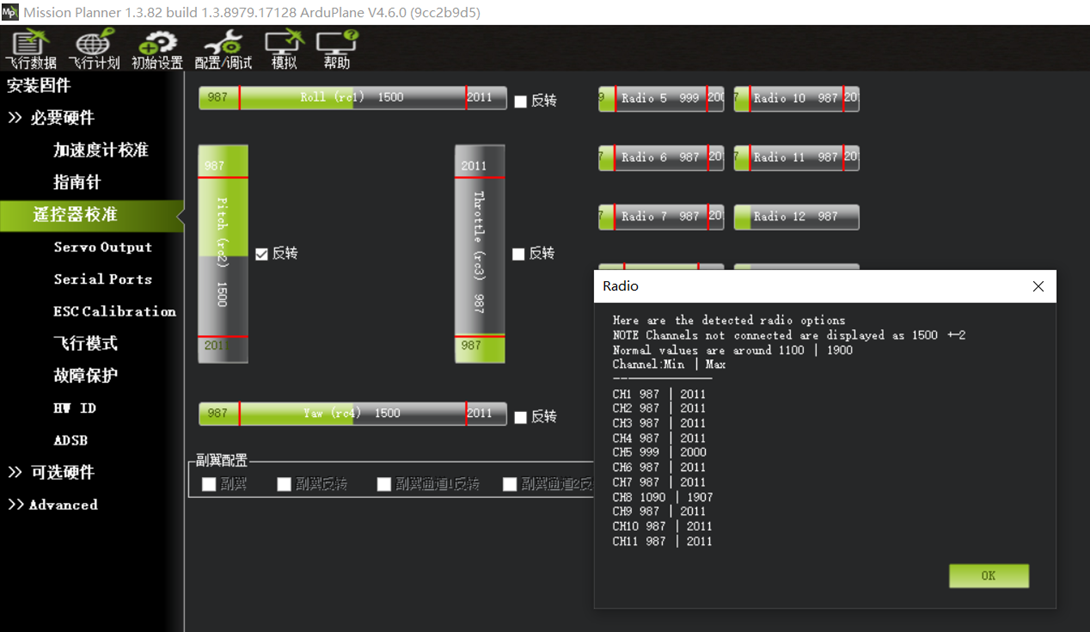
Radio transmitter calibration is now complete.